
Level 0: Getting ready
Spend about 30 minutes learning the names, numbers and symbols that every chord lesson uses. When you finish, you will be able to read a chord chart and know how to get your guitar ready to play. The guitar and chord charts below follow the left- or right-handed setting at the top of the page.
Meet your guitar
Chord lessons use these part names all the time. For now you only need to recognize them. This guitar is drawn for left-handed players, with the strings in the order you will see them on a left-handed guitar.This guitar is drawn for right-handed players, with the strings in the order you will see them on a right-handed guitar.
Parts of a left-handedright-handed guitar
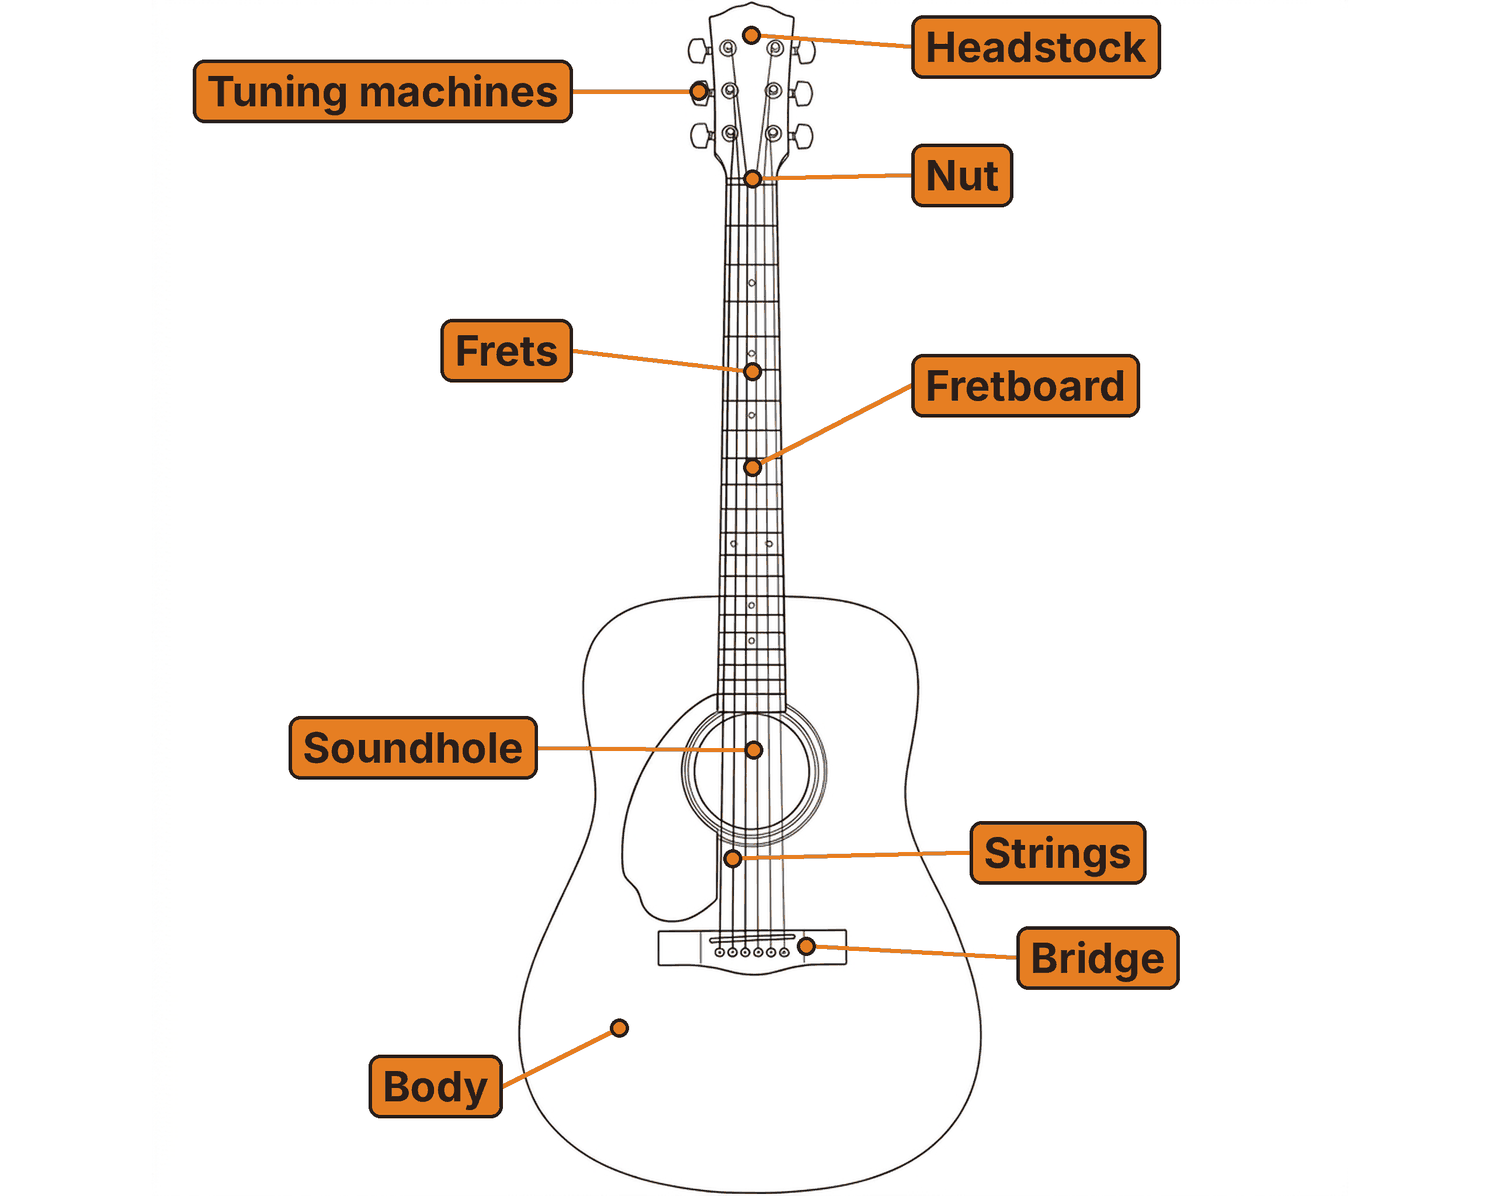
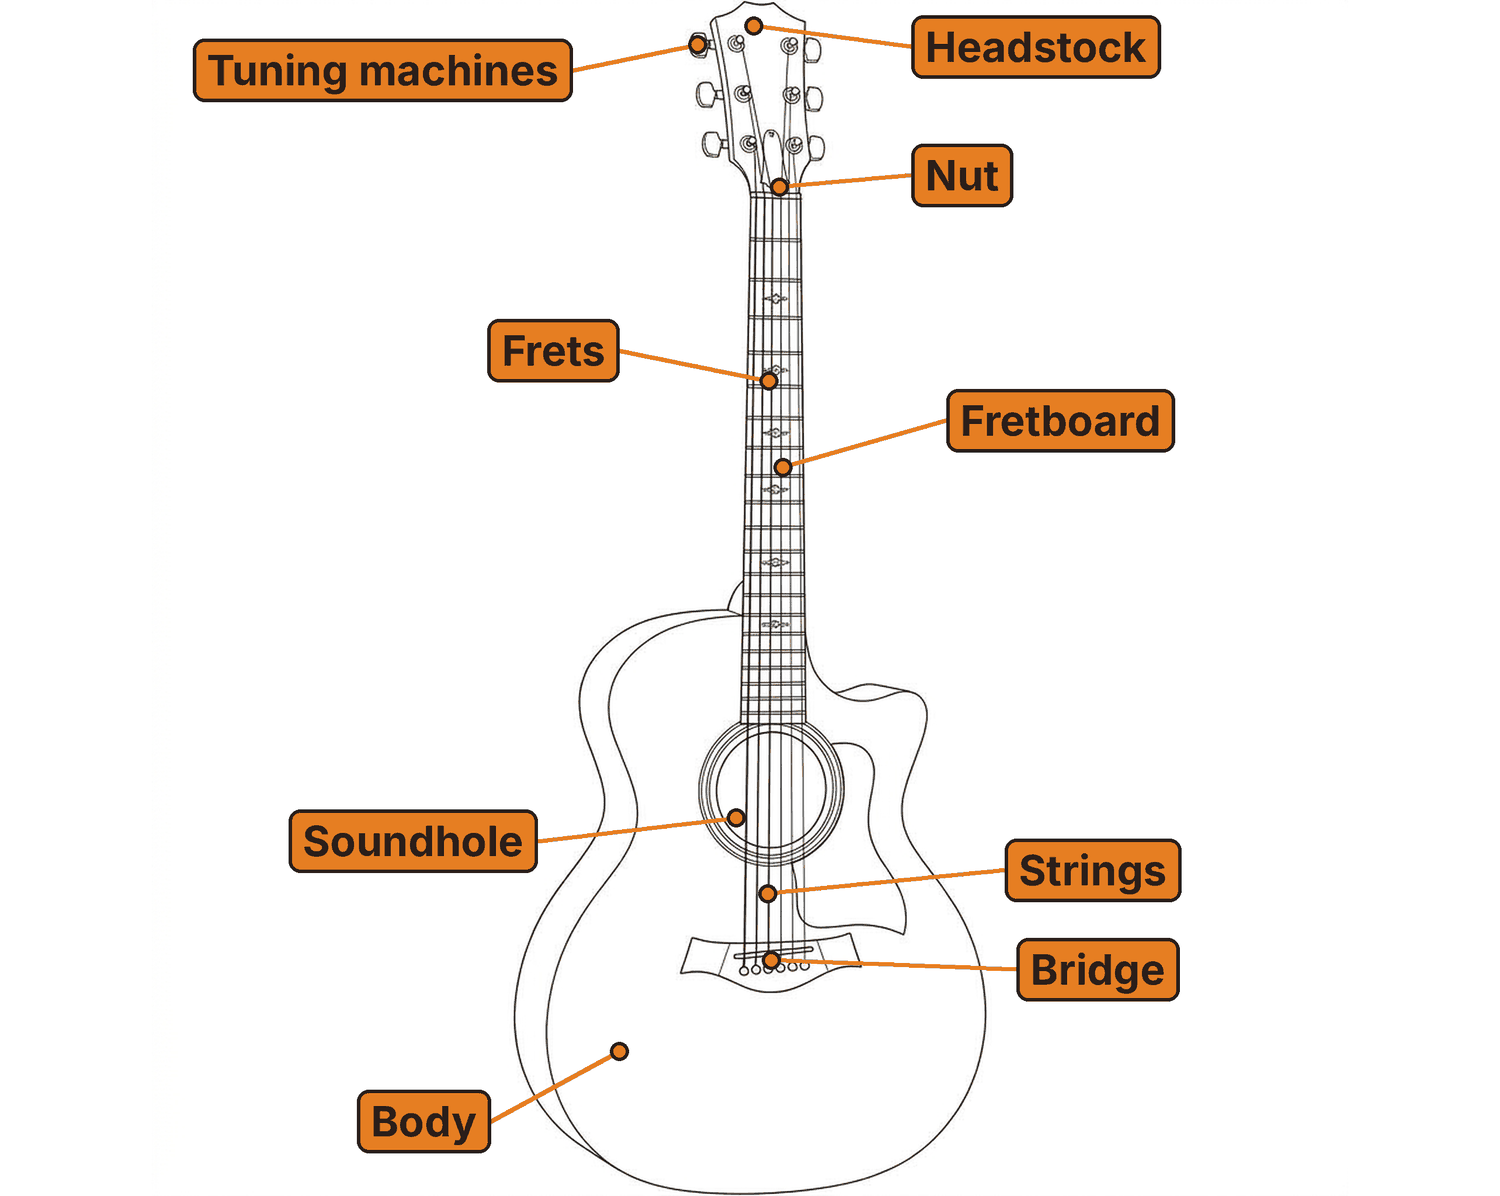
- Headstock. The top of the guitar. It holds the tuning machines.
- Tuning machines. Turning a tuning machine raises or lowers the pitch of its string. You will use them to tune.
- Nut. The small strip where the strings leave the headstock. The thick top line of a chord chart stands for the nut.
- Fretboard. The flat face of the neck. Your fretting hand presses the strings against it.
- Frets. The thin metal strips across the fretboard. Pressing a string next to a fret changes its note. The dots mark frets 3, 5, 7, 9 and 12 to help you find your place.
- Strings. Six of them, from thickest to thinnest.
- Soundhole. The opening in the body of an acoustic guitar that lets the sound out. An electric guitar has pickups instead.
- Bridge. Anchors the strings to the body.
- Body. The large part you rest against your leg.
Close-up of the left-handedright-handed headstock
Here is a close-up of the headstock and the first two frets. Each string is numbered and named, and each one winds around its own tuning machine.
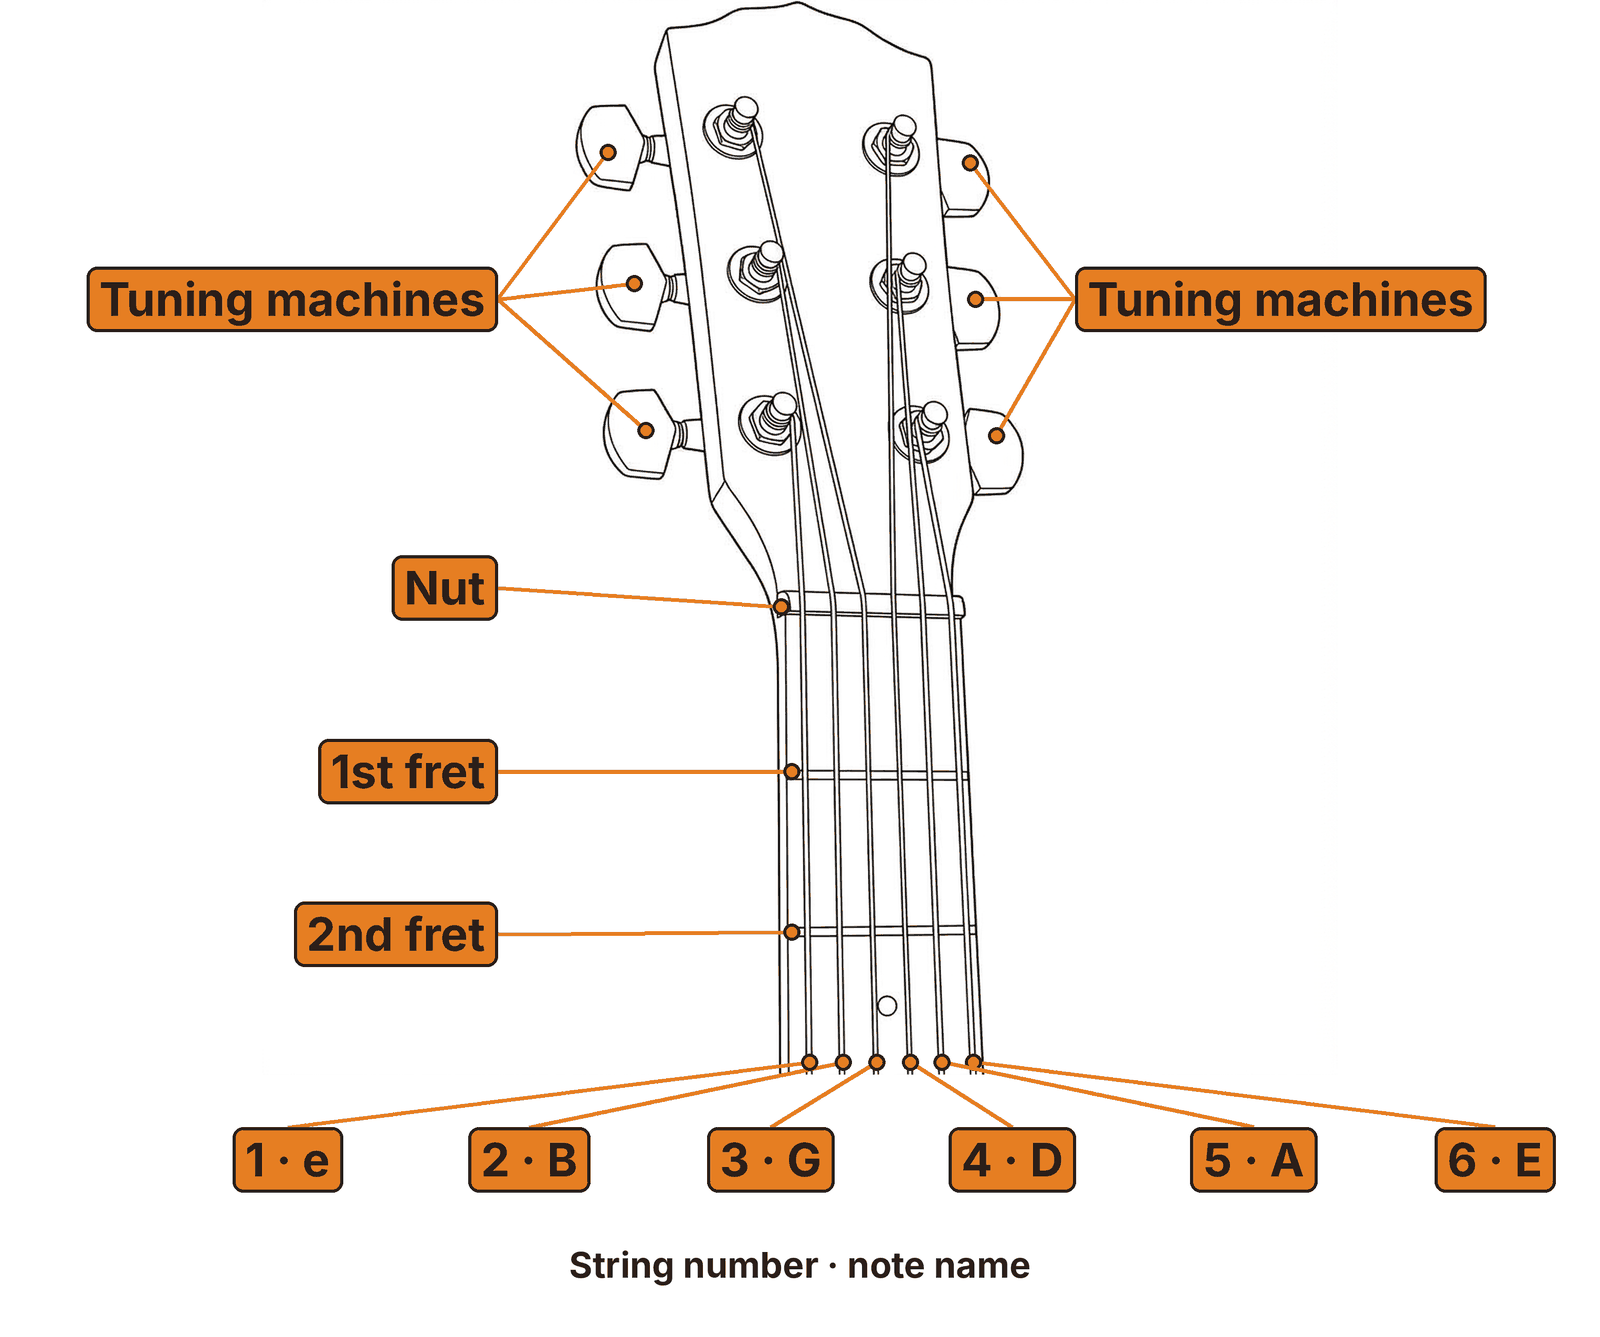
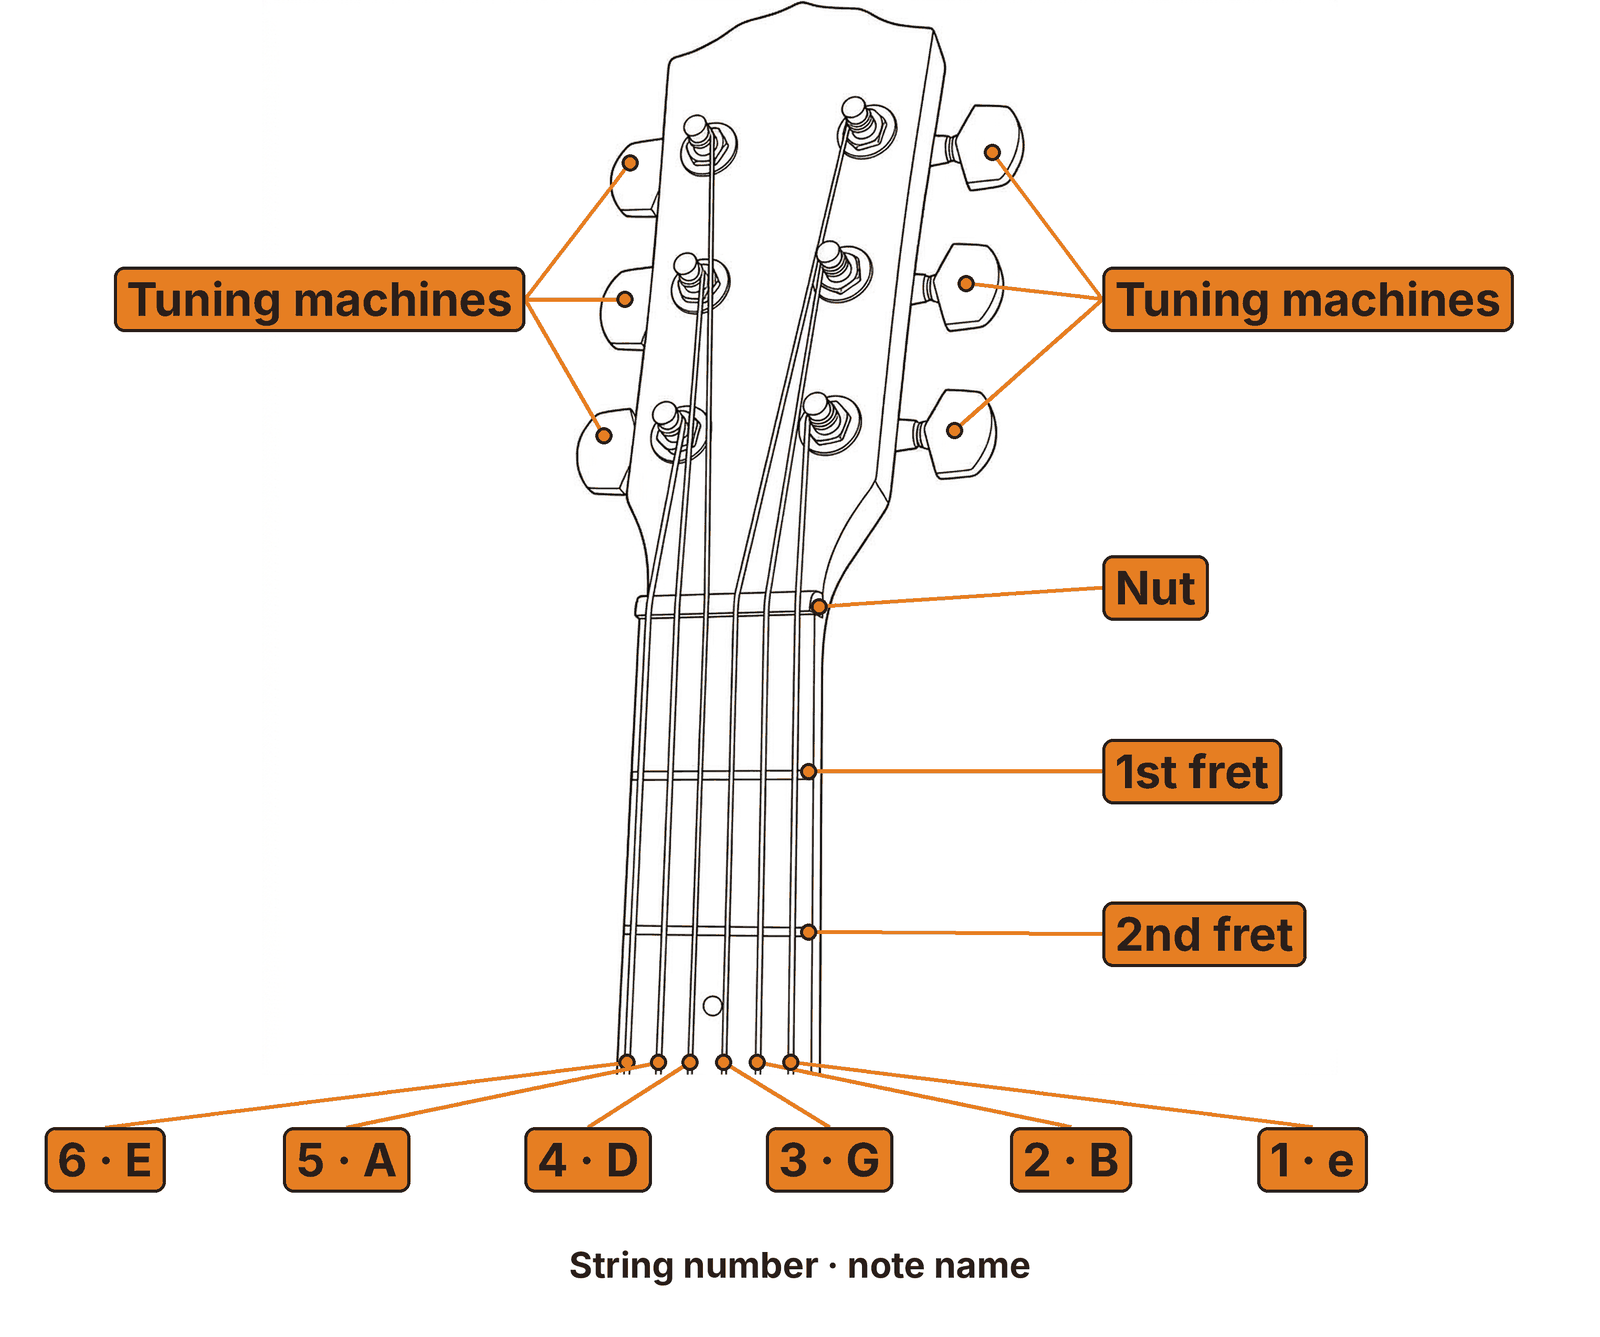
The guitar strings are numbered and tuned to specific notes. Standard tuning is E (low), A, D, G, B, and e (high). A helpful trick to make memorizing the strings easier is:
- E: Eddie
- A: Ate
- D: Dynamite
- G: Goodbye
- e: Eddie
Learn the six strings
Strings are numbered 1 to 6 from the thinnest to the thickest, and each one has a letter name. Chord charts use both, so it helps to know them well.
| String | Name | Sound |
|---|---|---|
| 6 | E (low E) | Thickest, lowest sound |
| 5 | A | |
| 4 | D | |
| 3 | G | |
| 2 | B | |
| 1 | e (high e) | Thinnest, highest sound |
To remember the names from the thickest string to the thinnest, say Eddie Ate Dynamite, Good Bye Eddie.
When you look down at your guitar, the thickest string is the one closest to your face. That is true for left-handed and right-handed players. The thickest and thinnest strings are both E. The thin one sounds two octaves higher, so charts write it as a small e.
Number your fingers
Chord charts tell you which finger to use with the numbers 1 to 4. Your fretting hand is your rightleft hand, the one that presses the strings on the neck. Your other hand strums.
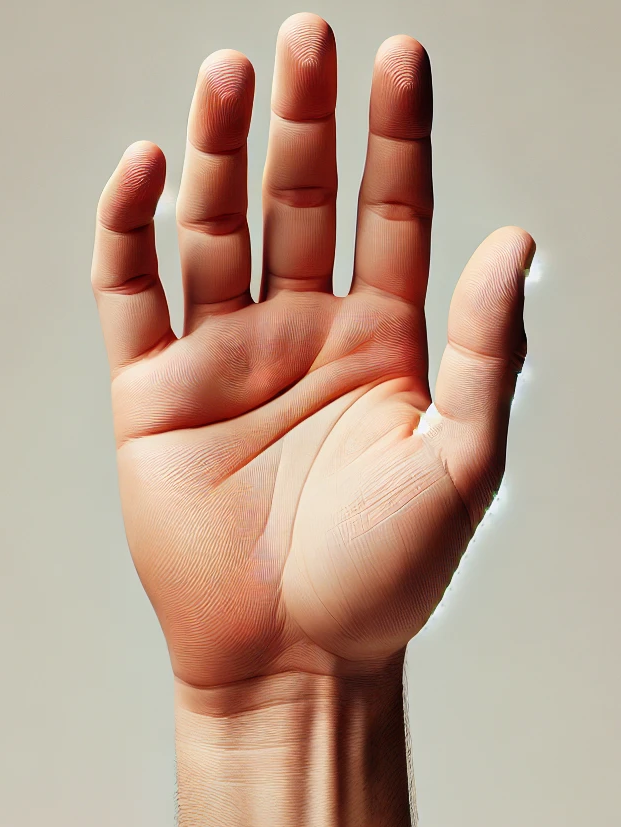 1234T
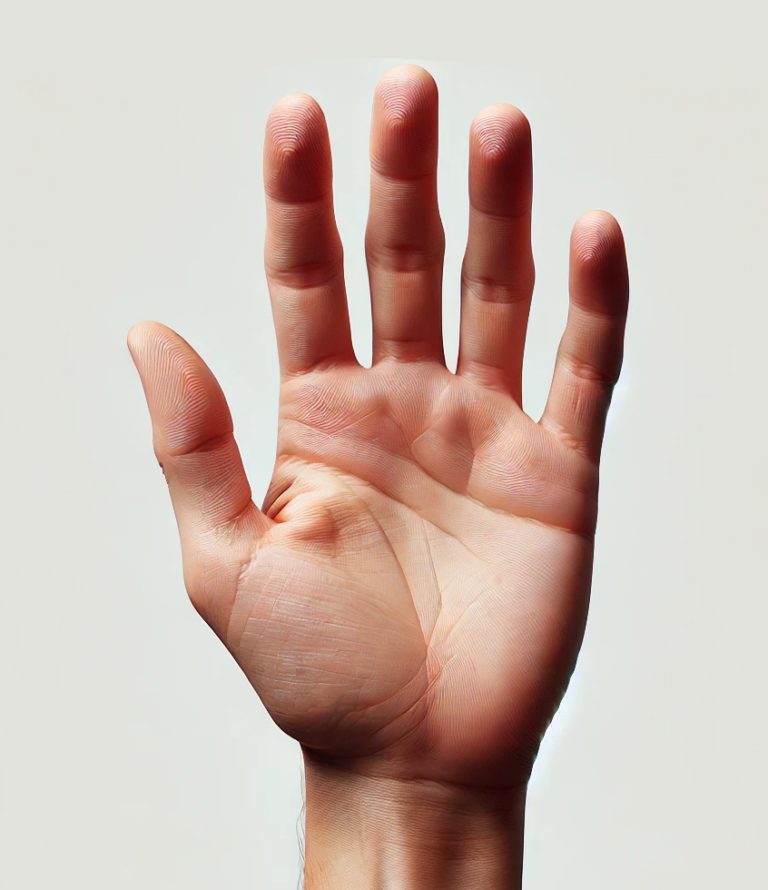 1234T
- 1 is your index finger.
- 2 is your middle finger.
- 3 is your ring finger.
- 4 is your little finger (pinky).
- T is your thumb. It rests behind the neck.
Hold up your rightleft hand and say the numbers out loud, starting with the finger next to your thumb. Do it a few times until you no longer have to think.
Read a chord chart
A chord chart is a picture of the neck, stood upright with the headstock at the top. This one is A minor. Match each numbered circle with the list below it.
- String names. The letters above the chart name each string, thickest to thinnest: E, A, D, G, B, e. On a left-handed chart the thickest string is on the right.On a right-handed chart the thickest string is on the left.
- X. Do not play this string. Start your strum on the next string, or lightly touch it with your fretting hand to keep it quiet.
- O. Play this string open, without pressing any fret.
- The nut. The thick bar at the top is where the neck starts.
- Frets. Each horizontal line is a fret wire. The top space is fret 1, the one closest to the headstock.
- Dots and numbers. A dot shows where to press a string. The number in it is the finger to use.
- Notes. The letters below the chart name the note each string sounds when you play the chord.
Want more detail? Read How to Read a Guitar Chord Chart, which also covers barre chords and charts that start higher up the neck.
Check your reading
Look at each chart, think of an answer, then open the answer to check.
How many strings are played open?
Show the answer
Four. The low E, G, B and thin e strings have no finger on them. Only the A and D strings are pressed down.
Which string has the X over it?
Show the answer
The thickest string, the low E. Skip it when you strum.
Which finger presses the thin e string?
Show the answer
Finger 2, your middle finger. The dot on the thin e string has a 2 in it and sits on the 2nd fret.
Get set to play
Tune up
Strings drift out of tune, especially on a new guitar. Use a clip-on tuner or a free tuner app and bring each string to its note: E, A, D, G, B and e. Check the tuning every time you sit down to play.
Sit and hold the guitar
Sit up straight with the body of the guitar resting on your leftright thigh, on the same side as your strumming hand. Tilt the neck up a little toward your rightleft so your fretting hand reaches it easily. Keep your shoulders loose.
Press the strings
Use the tips of your fingers, not the flat pads. Press in the space right next to a fret wire, on the side nearer the tuning pegs. Keep your thumb behind the neck and arch your fingers so they do not touch the strings beside them. Short nails on your fretting hand help.
Practice a little each day
Ten to fifteen minutes a day works better than one long session a week. Sore fingertips are normal at first and toughen up over a few weeks. Take a break if you feel sharp pain in your hand or wrist.
Choosing a left-handed guitar. Play a left-handed guitar, or have a right-handed guitar restrung and set up for left-handed playing. Turning a right-handed guitar upside down without restringing puts the strings in the wrong order, and every chart on this site will look wrong.
Ready for Level 1?
You are ready to move on when you can say yes to each of these. There is no test, so go on whenever you feel ready.
- I can name the main parts of the guitar.
- I know the six string names, thickest to thinnest: E A D G B e.
- I know my finger numbers: 1 index, 2 middle, 3 ring, 4 little finger.
- I can read the dots, numbers, O and X on a chord chart.
- My guitar is in tune.
- I am sitting comfortably with the guitar.